how To insert an image inside a list in WordPress

The WordPress Gutenberg editor is a powerful tool for creating and organizing content on your website. However, like any software, it has its quirks that can take some time to get used to. One such quirk is the way that the Gutenberg editor handles lists and inline images.
If you've ever tried to insert an image into a list in the Gutenberg editor, you may have noticed that it can be a bit of a challenge. The image block cannot be nested inside the list, which means that you need to find a different way to insert your image.
In this blog post, we'll explore the solution to this limitation and show you how To insert an image inside a list in WordPress using the Gutenberg editor using the inline image feature. Whether you're a beginner or an experienced WordPress user, this tutorial will help you get the most out of your content creation process.
how To insert an image inside a list in WordPress
Inserting images inside lists in WordPress Gutenberg Editor is easy.
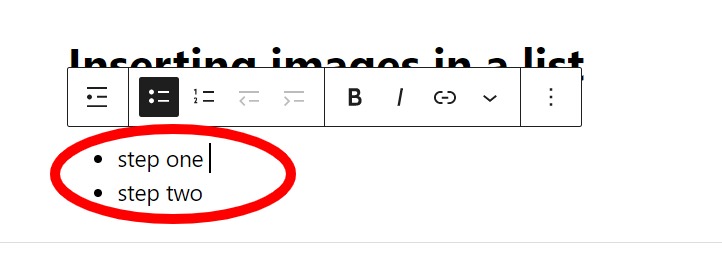
1. First, create a list by adding a list block.
.jpg)
2. Next, press Shift+Enter to go to the next line without proceeding to the next item in the list.
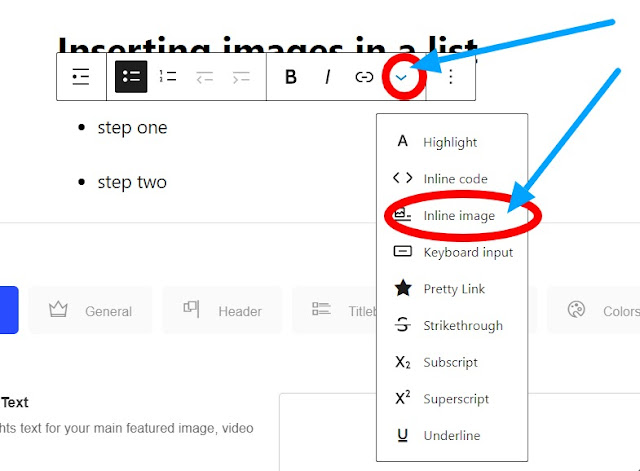
3. At the top right corner of the editor, click on the small arrow on the block picker and select the “Inline Image” button.
.jpg)
Then select or upload an image to insert from the Media Library.
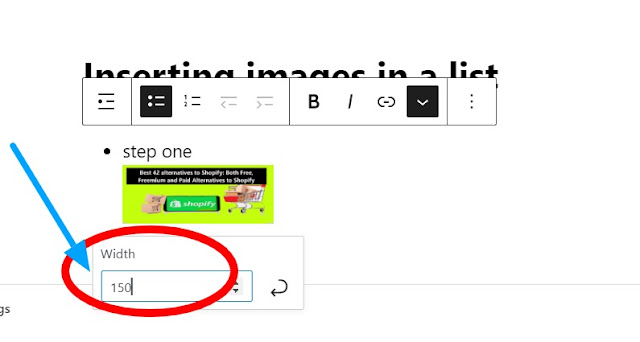
The image you selected will be inserted in the list, but it will be scaled to a width of 150px.
.jpg)
To resize the image to its original size, enter its original width in the box floating beside the image, then select Apply or Enter.
You can also resize the size of the image to a different width if you desire. If you desire to remove the image, just select the image and press the Delete button.
Finally, click enter to proceed with your list.