How to Add Codes From Google AdSense Ads on AMP Pages for WordPress
This short guide shows new users to AMP how to add codes from Google AdSense ads on AMP pages that are running WordPress blogs or websites.
Google AdSense is a platform that lets webmasters and people who are running websites or blogs to make money by including Google AdSense ads on to their pages.

Anytime users of your website visit your web pages and then have interaction with ads on your web pages, you get an opportunity to generate some income from these ads. And as such The more users your website has, the more money you may be able to make.
Putting Google AdSense ads units on normal WordPress pages is not complicated. To do this, just copy the Adsense ads unit Google provided when you sign in to your Google AdSense account or create a fresh ad unit. Then paste the Adsense codes you previously copied on any of your web pages and after a while, Adsense ads should start appearing.
But, if you are handling AMP web pages, the process is not that uncomplicated.
To put AdSense on AMP web pages, you will have to do it a different way.
The AMP Project is described as an open-source project that seeks to make the web pages load faster. If you are handling a WordPress website or blog and want to rank excellently in major search engine pages results, you may need to turn on AMP for your web pages.
If you can not enable AMP for your websites, then ensure that your sites load faster when compare to other sites.
NOW LETS LOOK AT HOW TO ADD Google AdSense Ads on AMP Pages ON WORDPRESS:
Step (1): Installing WordPress AMP Plugin on Your Site
An easy way to turn on AMP pages for WordPress websites that are using themes not built on the standard of AMP is by installing a recommended WordPress AMP plugin called AMP.
This WordPress AMP plugin backs fully integrated AMP publishing for all WordPress websites, with powerful capabilities and good granular publisher functions.
After the plugin installation, click the activate button to activate it and it will create separate AMP pages for your site.
Sub-Step 1: Getting AdSense Ads for AMP Sites
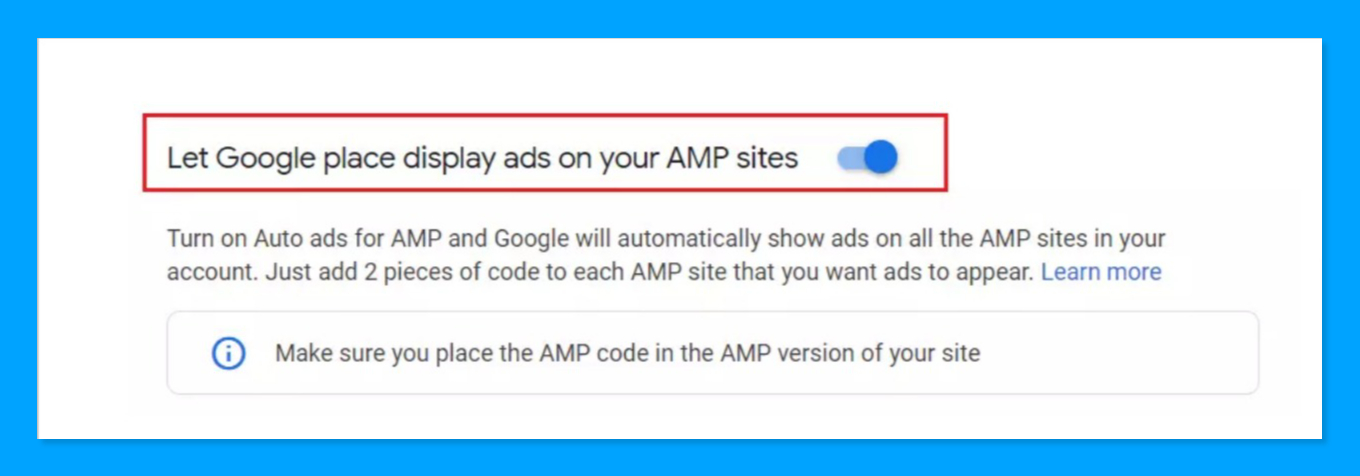
When you are done with the WordPress AMP plugin installation, log in to your AdSense account and turn on AMP ads. Enable Auto ads for AMP and Google Adsense will start showing ads on all the AMP websites in your Adsense account. All you need to do is to add two parts of code to all the AMP sites that you want Adsense ads to be display.

After turning on AMP ads in your AdSense account, you will be provided with two parts of codes that you will need to add to your website. One is to be added to your AMP site header while the other is to be added to the body of the AMP site.
Now Copy the first part of code Adsense gave you that looks similar to the one below:
<script async custom-element="amp-auto-ads"
        src="https://cdn.ampproject.org/v0/amp-auto-ads-0.1.js">
</script>
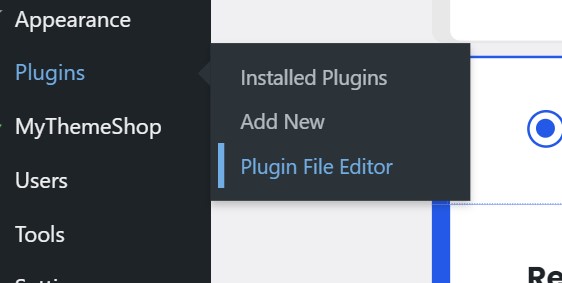
After copying the above,you need to go to the dashboard of your WordPress and locate Plugins ==> Plugin Editor

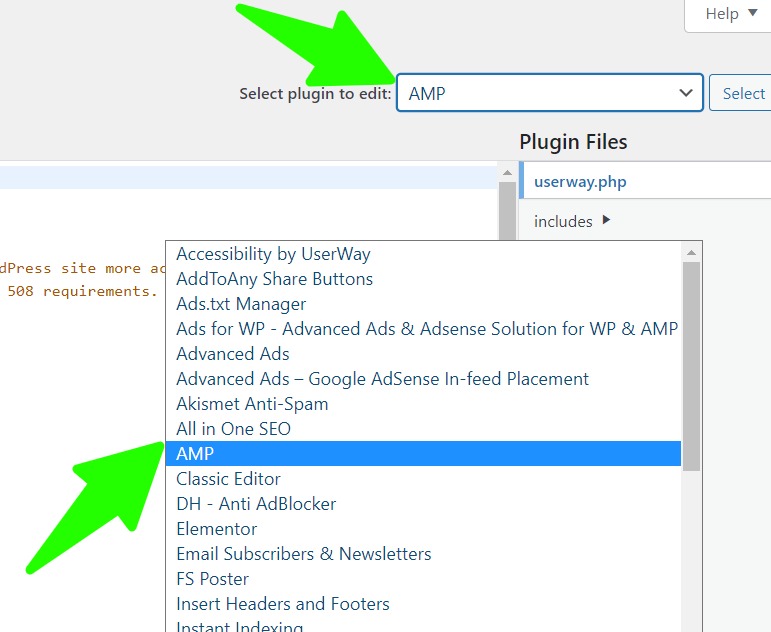
Then select the AMP plugin from the dropdown menu

Then Locate and open the html-start-php page.

Then Paste the code in the <head> and </head> area of the webpage as portrayed below:
<head>
<meta charset="utf-8">
<meta name="viewport" content="width=device-width,initial-scale=1,minimum-scale=1">
<?php do_action( 'amp_post_template_head', $this ); ?>
<style amp-custom>
<?php $this->load_parts( [ 'style' ] ); ?>
<?php do_action( 'amp_post_template_css', $this ); ?>
</style>
<script async custom-element="amp-auto-ads"
src="https://cdn.ampproject.org/v0/amp-auto-ads-0.1.js">
</script>
</head>
Then copy the second code and paste it into the body area of your AMP web page. This is in the same html-start-php web page, add the code in the body area as displayed below:
<body class="<?php echo esc_attr( $this->get( 'body_class' ) ); ?>">
<amp-auto-ads type="adsense"
data-ad-client="ca-pub-933557045840574345">
</amp-auto-ads>
<?php do_action( 'amp_post_template_body_open', $this ); ?>
Then Save the edit you have made on the html-start-php web page and exit
After you have saved the page, Adsense ads should start displaying on your WordPress AMP web pages in about a few minutes.
SubStep 2: Adding AMP Code using Theme Function
Because of the frequent updates to WordPress plugins, this results in all changes to the plugins being lost after every update, it’s advised that you add your AMP code using the WordPress theme’s function.php file.
To include the AdSense AMP header code and the body code through WordPress theme function, you have to go to your WordPress Dashboard ==> then Appearance ==> then locate Theme Editor.
Then pick the current theme, and click open the function.php file.
after the file has opened, copy the two parts codes comprising of the Header and body Adsense code into the function.php file and save.
AMP Header code
add_action('amp_post_template_head','adsense_amp_head');
 function adsense_amp_head($amp_template) {
 ?>
 //you are to Paste Google AdSense AMP header code in here
 <?php
 }
AMP Body code
add_action('amp_post_template_footer','adsense_amp_footer');
function adsense_amp_footer($amp_template) {
?>
//you are to Paste Google AdSense AMP body code in here
<?php
}
Now click the Save button to save the function.php file and you have just accomplished adding your Adsense AMP code to your AMP site.
Now that you are done, Adsense AMP ads should start displaying on your AMP site’s web pages.
Conclusion:
This post guides WordPress students and new users of WordPress on how to add Google AMP ad units on any WordPress AMP web page. If you discover any errors in the above guide, please give us a comment below to report these errors. And if you need also comment below.
WATCH THE BONUS VIDEOS BELOW:
How to setup Adsense ad on AMP Pages
Google Adsense: Earn $95.25 Per Day in These Easy Steps: