How To Set Up Social Media accounts For Your Business For Better online Presence: A Step By Step Guide For Beginners.

An important component for any business is social media. Brands connect with their customers with the help of Social media platforms, increase brand awareness, and bring them leads and sales. In this article, I am going to guide you on How To Set Up Social Media accounts For Your Business.
Over 3.80 billion people around the world are using social media every month.
How much is 3.8 billion, you ask?
Well, To sum up, China's and India's population is 2.82 billion, and these two are the countries with the highest population.
So yes, 3.8 billion is a substantial number.
Easy fact: Your brand needs a social media presence!
While we always discuss the value and benefits of having a business profile on social media, let us take a look at how to build a good social media profile.
You might be discouraged by the requirements to create a social media profile. If you prefer having an all-in-one guide for building a social media profile for your business, this blog is for you!
Features Of A Successful Social Media Profile
Display Name:
This seems relatively fundamental; the name that appears on social media profiles is the display name.
Your real name can be a display name. Whereas, some networks like Twitter give you the choice of using a nickname.
User Name:
The user name on most social media networks is in the URL and usually cannot be changed. So choose wisely!
The best way is to use the same name across all social media networks.
@yourname on Instagram, @yourcompanyname on Twitter @yourmiddlename on Facebook can be confusing.
As an exclusion, if you have legal restrictions or you are the company's face, you may choose otherwise.
Profile Picture:
You can go with your picture or the company logo in case of the company profile unless, of course, you are a brand yourself (ex. musicians, politicians, singers).
As per the best method, use a headshot.
Again, it's a good practice and approved to go for the same profile picture on all your social media profiles.
Company Link:
For business profiles, it's a suitable idea to put your company link in front and center. It gives assurance that you get maximum disclosure, and people visit your company profile by clicking on the link.
You can design social media-specific landing page links so that you can keep a record of which network brings you the most traffic.
You can even use these pages to offer unique discounts to audiences who have found you on specific social media networks. You can list these offers in your Blog. In that, you benefit in both ways.
Profile Biography:
It is a preface to your brand. The length of the bio will range depending on the limit given by different social networks. Typically, it includes a line or two about your business.
Profile tip: Finish your biography with a call to action.
An excellent impression matters a lot!
Background Or Cover Photo:
Some social platforms allow you to have a background image just behind your profile photo.
Some brands select a default cover picture, but that is an opportunity lost!
You can share a piece of additional information about your brand.
Make sure it is not too rowdy or essential for your profile photo.
Privacy Setting:
After you have finished with the necessary information on your profile, take a look at your profile's privacy setting. For each network, it will be different but make sure the information you want to share is open to the right audience.
Perhaps, if it's a business profile, you will want to keep information public, but you might need to hide some information for a personal profile.
Activity:
The cheerful part is sharing interesting content.
Social Media Code Of Conducts:
Before moving forward with creating your social profiles, it's important to know some social media standards.
Sourcing Properly:
Do not give out content that you received from an untrustworthy source. Watch out for the information you read.
Deletions and Errors:
Observe if you are editing a post that is publicized. Do not replace the pictures of the original article, especially if it's deceptive.
Accountability:
Be committed to the information you transmit. Show apology if someone is annoyed by your content.
Privacy:
Respect the solitude of everyone. Please do not give out any personal information about someone without their license or consent.
Personal Bias:
Do not change facts to match your opinion; this can be misleading.
Apart from the points listed above, if your business belongs to a regulated sector such as finance, healthcare, etc learn about social media compliance for regulated industries.
General Demands Before Creating Profiles On Social Media Platforms
Email Address:
Just like your home address, the email address is a digital address because all the essential information will be conveyed via email.
Make sure it is your working email.
Use one email address for all your social media profiles also. It enables ownership over accounts to be retained and keeps all accounts compatible and organized.
Create one, if you don't have a business email ID.
Username versus Name:
A name is your real name, while a username can be your nickname. The presented name on your profile can be a username or a real name, depending on different social networks. Notwithstanding, it is appropriate to keep the same name throughout social networks for consistency and visibility.
At some points, the display name cannot be changed once you submit it. So you have to be careful when you enter your details.
In the aspect of Business profiles, the display name should be the name of the company or brand that you represent.
Password:
Create a password you can easily remember. Do not share your password with anyone. It should not be a universal name.
Characteristics Of A Strong Password:
- Should not be less than eight characters (more the better)
- Uppercase and lowercase should be combined
- One unique character at least
- One numeric value at least.
How To Set Up Social Media accounts For Your Business: Process To Creating A Profile
Facebook:
Traditional media channels have been replaced by Facebook ever since its founding in 2004.
It’s a social media platform for sharing content with friends and families. Mark Zuckerberg founded Facebook and currently has over 2.80 billion monthly users.
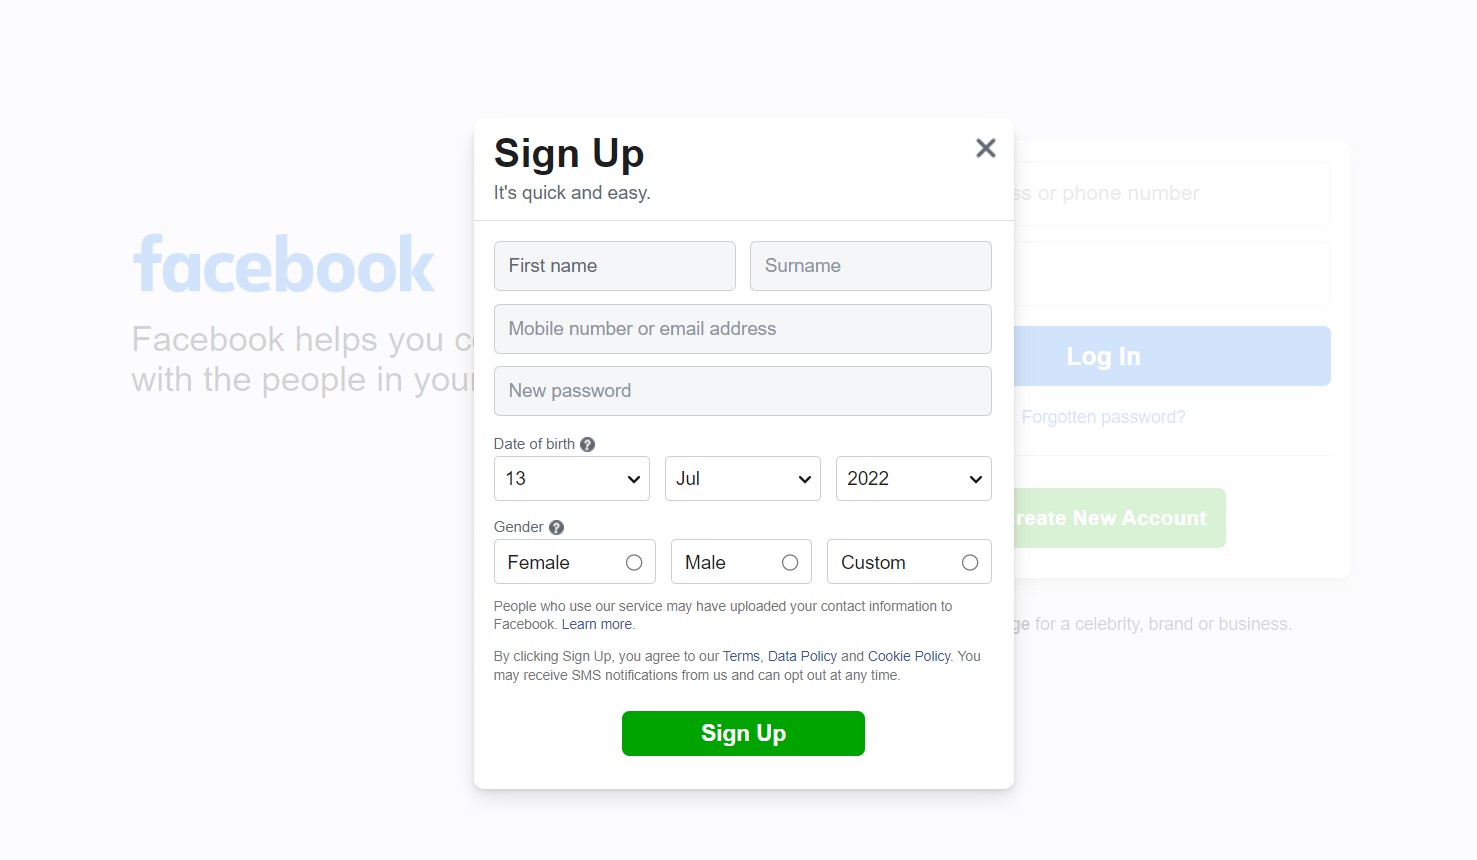
Step 1: Go to facebook.com:
Log in to Facebook, and enter your email address and password to continue.
You can sign up by adding your personal information if you are not a member, choosing an interest, and profile picture. Facebook will send you a verification link for you to verify your email address or phone number by clicking the link.
Do not worry about the personal information being shown on your business page. You may decide not to show the information on the business page.
Step 2: Click on the ‘+’ icon menu or the hamburger icon menu at the top right corner as circled in the image below. Scroll down and tap on ‘Create page.' also circled in red.
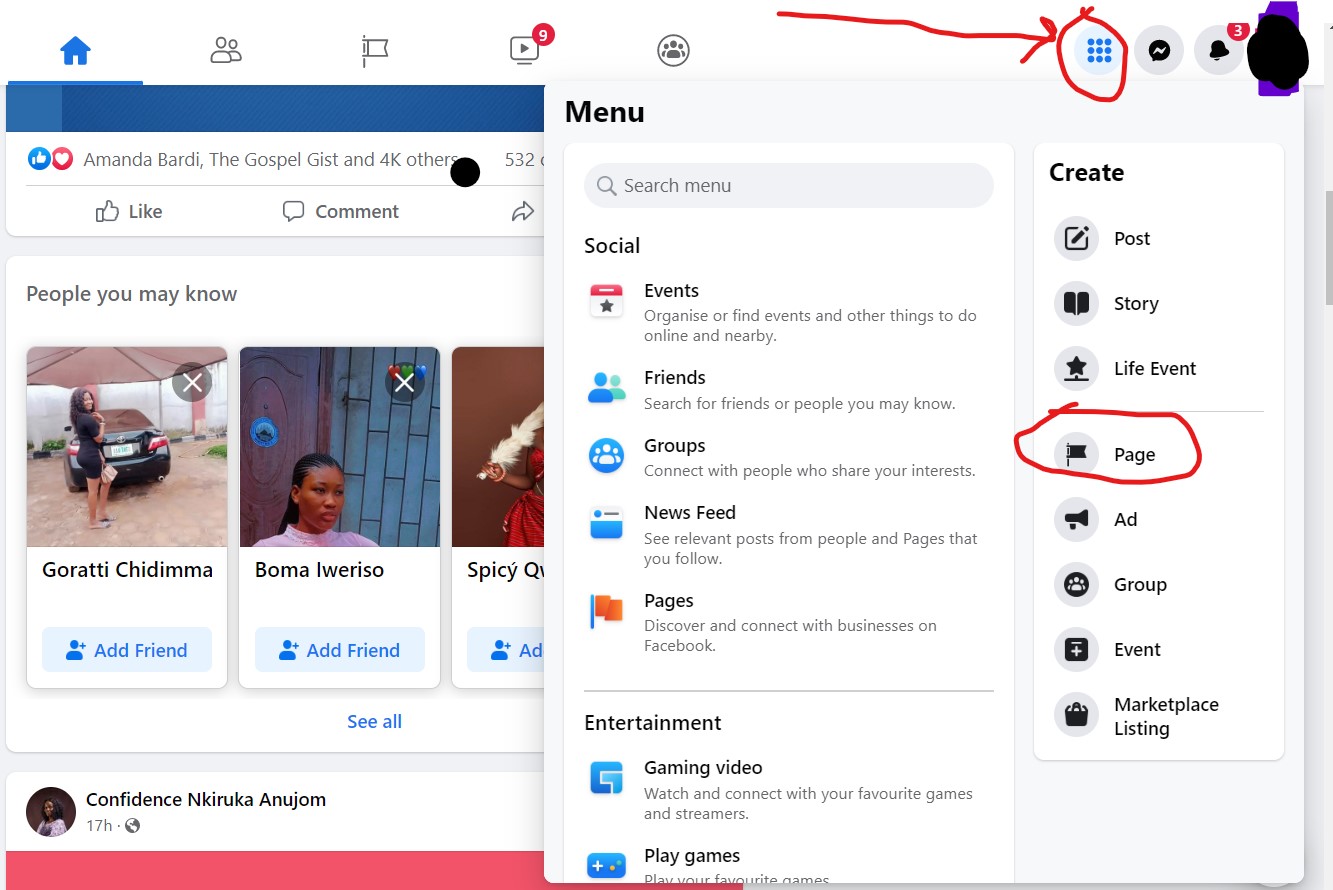
You can select the options available if you already have one or create a new page.
Step 3: insert your ‘Page name' and ‘Niche' that best defines your brand. Facebook will give you a guide through a setup wizard.
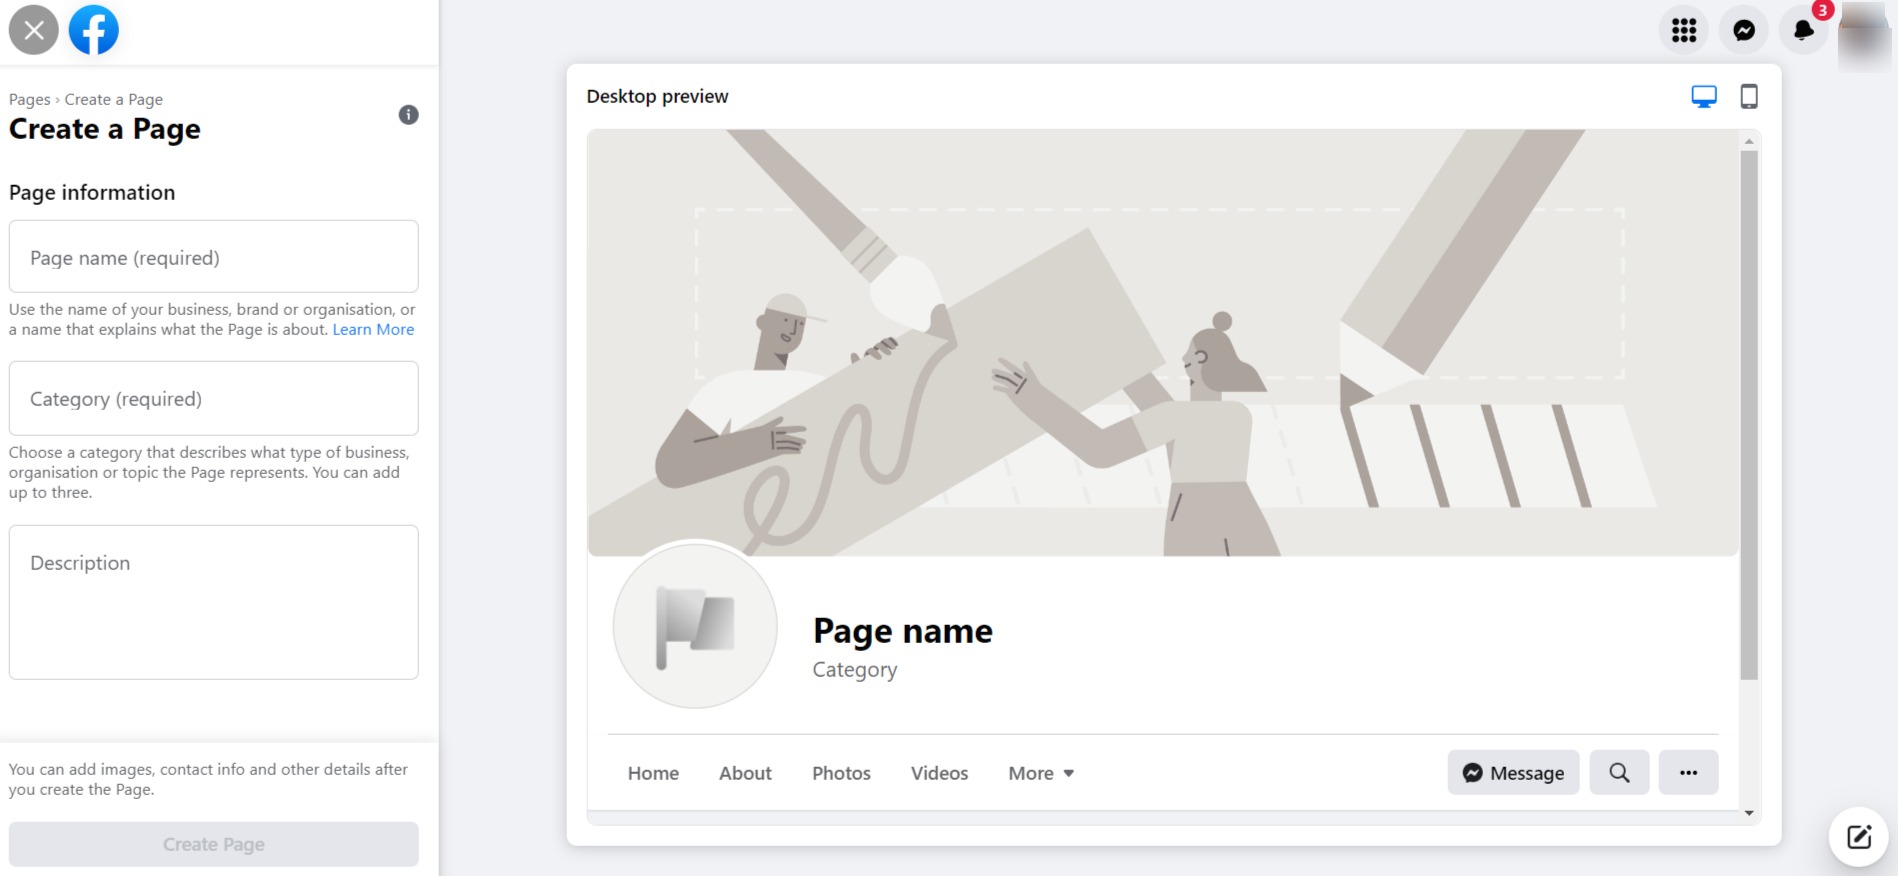
As you are completing a description of your page, make sure to use suitable keywords that will enable the search engine to find your page.
The default Facebook has a long address so you need to customize your own Facebook address.
Step 4: You need to insert your profile picture, which will be your logo sized at 180 x 180 pixels.
Step 5: By selecting ‘Add to favorites’, you have easy access to your company’s page
Step 6: Tap on ‘Promoted Posts‘ if you want to spend money to contact more audiences or you skip this process.
Step 7: Add a cover picture to your page. Post your first status to contact your audience.
Step 8: Tap on ‘Publishing tools,' then choose ‘Schedule post' followed by ‘Create' to re-schedule your post.
Twitter:
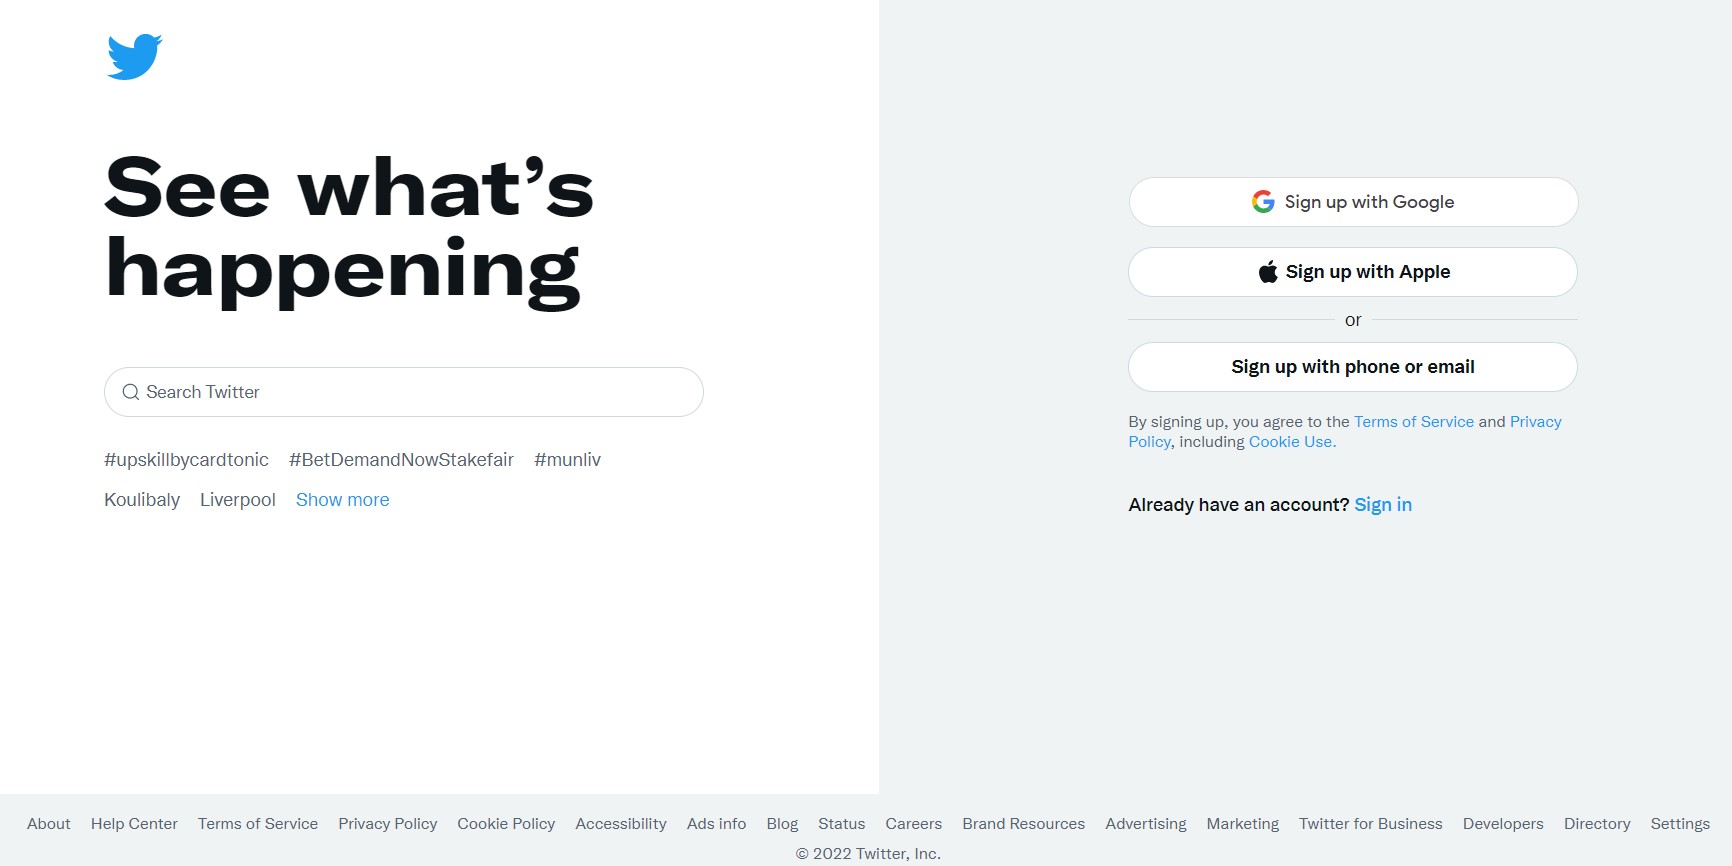
Twitter is another platform that has over 353 million monthly users actively on it. Your business needs to be here. Create a business status on Twitter using the steps below.
Step 1: You download the Twitter app or go to Twitter.com, tap on signup, and enter your name (business name), active email address, and password. Twitter allows only one profile to be created per email.
You will be asked for your phone or email verification on Twitter
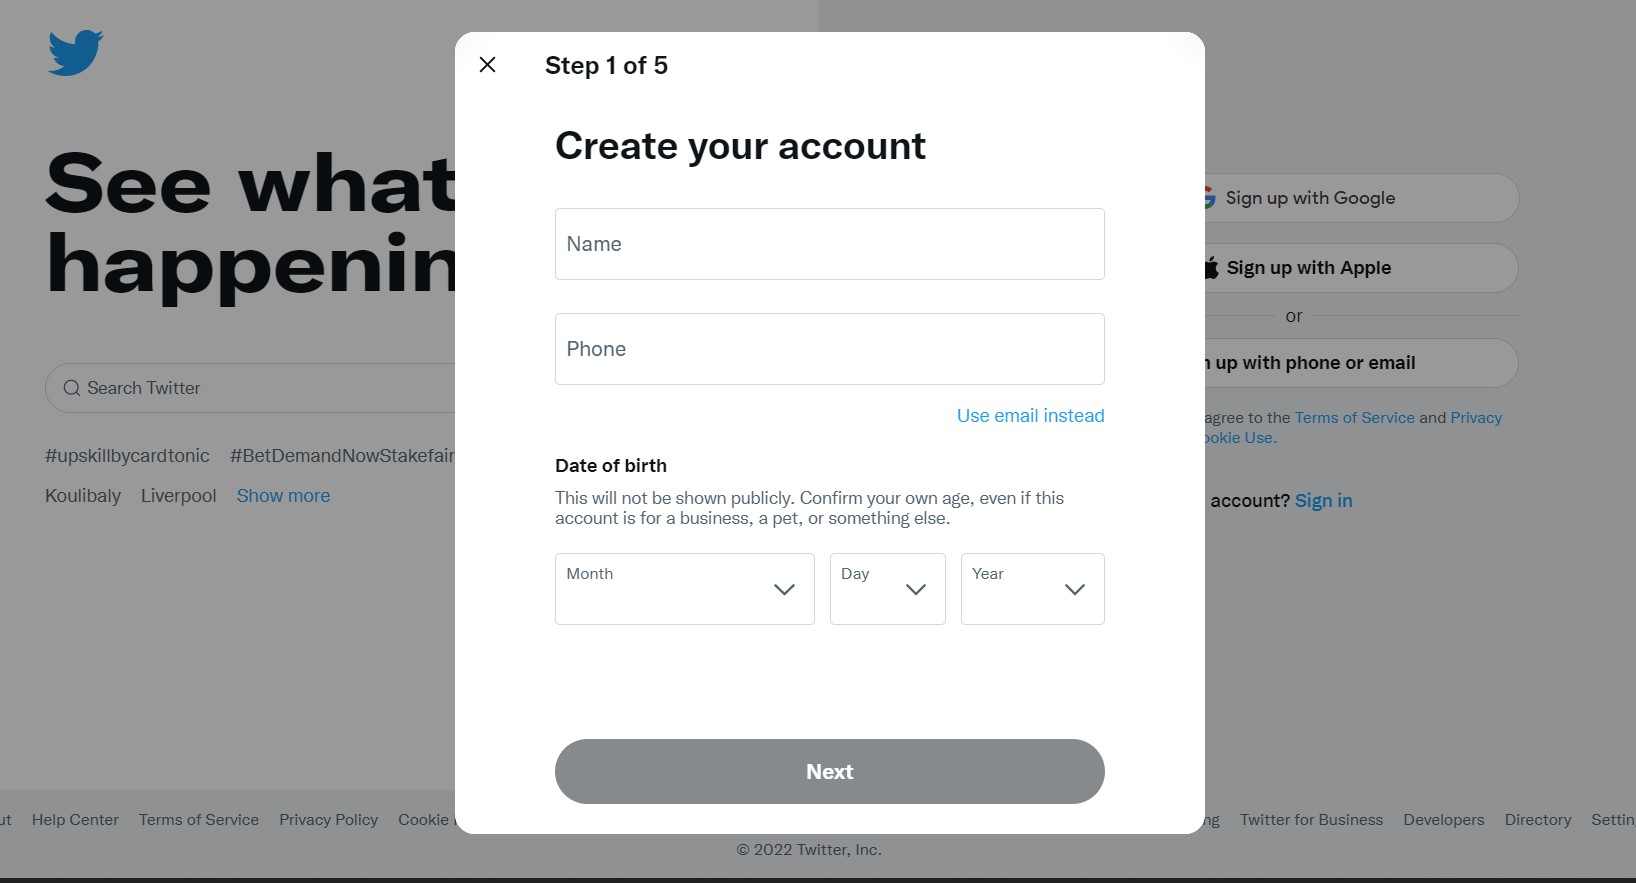
Step 2: Select your username. Your username can not be the same as your real name; however, it cannot exceed 15 characters. Note: Do not add any year to your username as it would look out-of-date once the year passed.
Step 3: Twitter will then show you people you can follow based on your interest. You can decide to skip this process.
Step 4: Add a picture and header of your choice (maximum size of 5MB), depending on how you want your brand to be represented. Using your brand logo is preferred.
Add a brand site so your audience can go directly to the company’s page for more details.
Add biography, but be brief as you have only 160 words to define your brand.
Step 5: Twitter will now take you to the home page. You can tap on your profile and choose to edit it if need be.
Pinterest:
Pinterest is a photo-sharing and social media platform. Pinterest is designed to enable storing and discovery of data using pictures, Graphics Interchange Formats (GIFs), and videos like a pinboard. Pinterest was formed in 2009 and they have about 459 million monthly users active.
Traditional office or home pinboards have been replaced by Digital Version with Visual Search Engines.
Follow the easy process below to create a Pinterest account:
Step 1: Open pinterest.com and tap create account
The login details can be the same as Google or Facebook, or your account might be different from Pinterest.
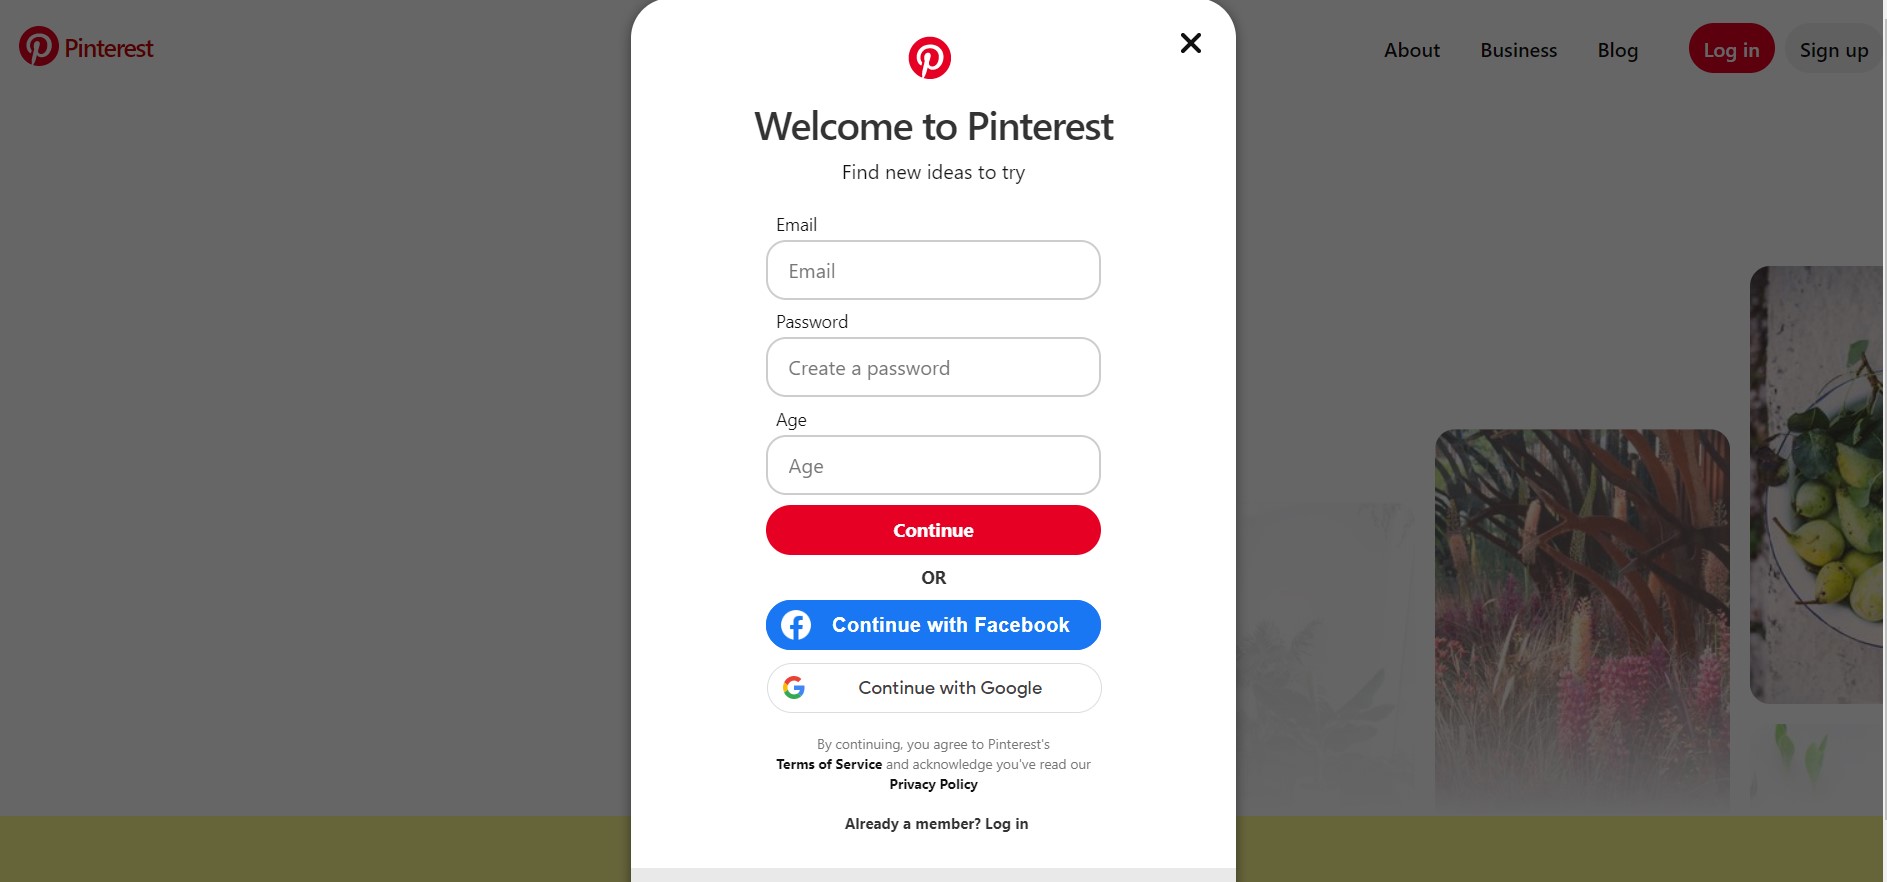
Step 2: You can link about four business accounts to your account. You can also have a business account that is not linked to any personal account.
Step 3: Fill in the information about yourself.
You select the topic you like on the next page and this will create your home feed.
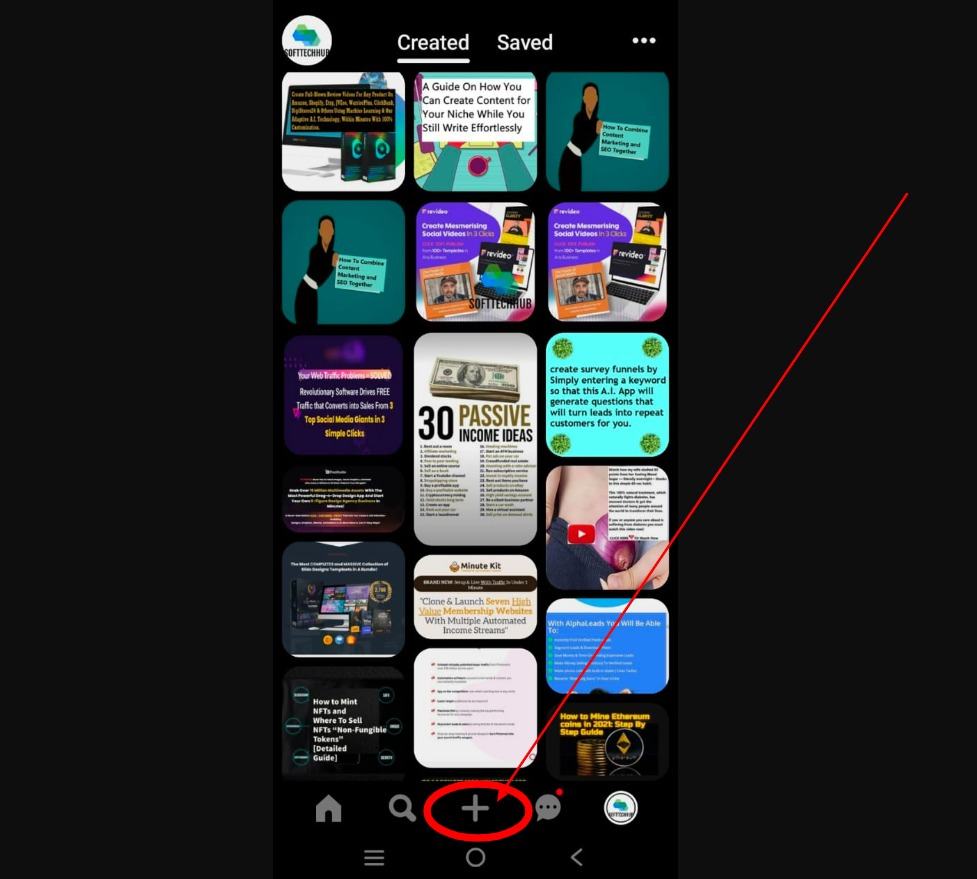
Step 4: Tap the “plus sign” on the right bottom of your home page to begin to pin.

Snapchat:
Snapchat was established in 2011 and now has about 498 million active users. Snapchat allows users to exchange videos and pictures which are meant to disappear when they have been viewed.
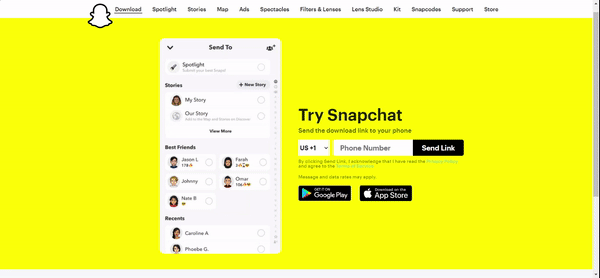
Snapchat is also known as a ‘new type of camera' as its important function is to add lenses, filters, and other effects to the photo taken.
You can register a business profile with Snapchat. Let's begin to create the account.
Step 1: You can view Snapchat's business profile here. Tap sign up.
Step 2: Submit User details like birthday, username, and phone number (make sure that it has your business name). Your username is unique and you cannot change it.
Step 3: Tap ‘Continue' and then add your company’s name (a legal company’s name)
Step 4: Fill in information about your company on the next page. Tap on ‘Get Started'.
Step 5: After completing the form, A verification code will be sent to your business email. Then you can go through the Snapchat business account.
Step 6: Snapchat ads manager page will show, which will help you find appropriate features you will want to use to promote your company.
Instagram:
This is the best time to create an Instagram account for your business if you don’t have one.
Instagram has seen a speedy rise in recent years and offers an unmatched chance for businesses to advertise their services and connect with fans.
Steps for creating an Instagram account:
Step 1. Download the Instagram app. Two ways in downloading the Instagram app: on your iOS/Android smartphone or with your Mac or Windows PC, you can download through the web browser.
Step 2. Tap Sign up when you open the app.
Step 3. You now enter your business email address.
“If you intend to grant access to many users or you want to link your Instagram business account to your Facebook Page, be sure to use an admin email address to sign up or click Log in with Facebook.”
Step 4. Choose your username and password to complete your profile info. Facebook may ask you to sign in if you log in with Facebook.
Step 5. Click next and you've successfully created your Instagram account
You can now switch from your account to an Instagram business account easily. An Instagram business account provides more tools to maintain and grow your business.
Benefits of having an Instagram Business Profile:
- Adding business contact information (i.e. email, phone number, and business location)
- Advertising your business
- Access to data analysis
- Features of built-in eCommerce
Steps to change from a personal account to an Instagram business account:
Step 1. Go to your profile from your Instagram account
Step 2. In the right-upper corner, click on the hamburger menu
Step 3. Click on Settings.
Some accounts may show Switch to Professional Account from this menu. If it does, click it. Or else, move to the next step.
Step 4. Tap account & select a business
Step 5. If you plan to link your Facebook business account and Instagram account, take the steps to link the account to your Facebook Page.
Step 6. Choose your business niche and add important contact details.
Step 7. Click Done.
LinkedIn:
Before your company begins LinkedIn marketing, it requires a LinkedIn page.
To create a LinkedIn profile, follow the steps below:
Step 1: Visit the LinkedIn Pages, from the category of the LinkedIn Marketing Solutions site click on create your Page
Step 2: You now select the appropriate section for your business & fill in the details.
A page preview shows how it looks as your content is added. Select a good URL for your brand. If you can, make it the same as your username on other social websites.
Step 3: You upload your business logo and add your tagline and tap create page
Step 4: Your Page is ready
To add details, tap the pencil icon on your profile under your business name.
Adding more information to your LinkedIn Page
Step 5: Company description – in two to three short paragraphs, describe your products and services.
Step 6: Location – where your corporate office or store is located. You can add multiple addresses by choosing the + Add Location button
Step 7: Hashtags – For your profile to be more searchable, you add up to three hashtags
Step 8: Cover photo – You can add to your profile a background photo. Select a picture that talks about your business.
Step 9: Custom button – To boost action, you should add a button to your profile. Options include visiting the site, learning more, contacting us, registering, and signing up.
Now all your business page is set up, it’s time to begin sharing your content.